原生js实现轮播图
2023-07-08 03:49
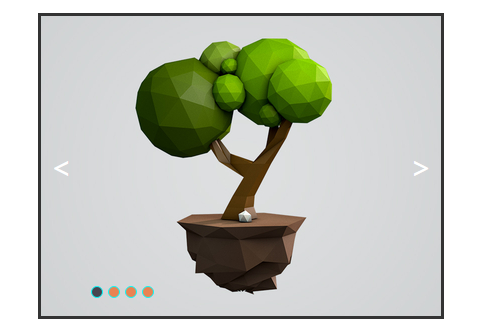
一. 最终呈现效果
1.点击左右两边的箭头切换图片
2.当鼠标移出图片范围,自动切换下一张图片;
当鼠标移入图片范围,停止切换下一张图片
3.切换到某一张图片时,底部的按钮样式也跟着改变
4.点击按钮即可切换到相应位置的图片
二. 轮播图片原理
一系列的大小相等的图片平铺,利用CSS布局只显示一张图片,其余隐藏。通过计算偏移量利用定时器实现自动播放,或通过手动点击事件切换图片。
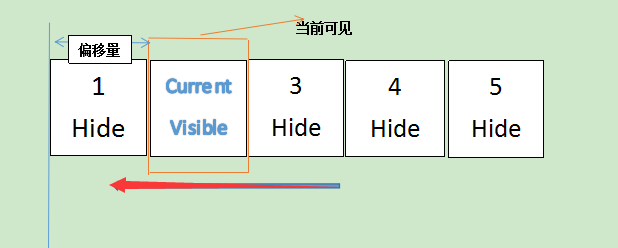
(图片来源:https://www.cnblogs.com/LIUYANZUO/p/5679753.html)
三. 开始
整个实例已上传至github: https://github.com/MrXuxu/H5_demo/tree/master/%E8%BD%AE%E6%92%AD%E5%9B%BE
-lunbo.html
-lunbo.css
-test.js
1.HTML
<body>
  <div id="container">
    <div id="list" style="left: 0px">
      <img src="images/landscape-test-1_1x.jpg" alt="" />
      <img src="images/render1_1x.jpg" alt="" />
      <img src="images/space_1x.jpg" alt="" />
      <img src="images/trees_1x.jpg" alt="" />
    </div>
    <div id="buttons">
      <span index="1" class="on"></span>
      <span index="2"></span>
      <span index="3"></span>
      <span index="4"></span>
    </div>
    <a class="arrow" id="prev"><</a>
    <a class="arrow" id="next">></a>
  </div>
  <script src="js/test.js"></script>
</body>
2.CSS样式
* {
	margin: 0;
	padding: 0;
	text-decoration: none;
}

#container {
	margin: 20px auto;
	width: 400px;
   /*此宽度根据图片宽度调整 */
	height: 300px;
  /*此高度根据图片宽度调整 */
	border: 3px solid #333;
	overflow: hidden;
   /*为了将图片隐藏*/
	position: relative;
}

#list {
	width: 1600px;
  /*图片总宽度*/
	height: 300px;
	position: absolute;
	z-index: 1;
}

#list img {
	float: left;
	width: 400px;
	height: 300px;
}

#buttons {
	position: absolute;
	height: 10px;
	width: 100px;
	z-index: 2;
 /*将buttons放在list上层*/
	bottom: 20px;
	right: 250px;
}

#buttons span {
	cursor: pointer;
	float: left;
	border: 1px solid aqua;
	border-radius: 50%;
	height: 10px;
	width: 10px;
	margin-right: 5px;
	background: #e98352;
}

#buttons .on {
	background: #474550;
}

.arrow {
	cursor: pointer;
	line-height: 60px;
	text-align: center;
	font-size: 30px;
  /*设置箭头的大小*/
	width: 40px;
	height: 60px;
	position: absolute;
	z-index: 2;
  /*将arrow放在list上层*/
	top: 120px;
	color: #fff;
}

#prev {
	left: 0;
}

#next {
	right: 0;
}

#prev:hover,
#next:hover {
	background: #333;
}
3.JavaScript
①. 点击左右两边的箭头切换图片
window.onload = function () {
  var list = document.getElementById("list");
  var prev = document.getElementById("prev");
  var next = document.getElementById("next");
  function animate(offset) {
    /*获取的style.left,是相对左边获取距离,所以第一张图后style.left都为负值*/
    /*且style.left获取的是字符串,需要用parseInt()或者parseFloat()取整转化为数字。*/
    var newLeft = parseInt(list.style.left) + offset;
    list.style.left = newLeft + "px";
    list.style.transition = "300ms ease"; //给动画添加过渡时间
    /*从最后一张偏移值到第一张*/
    if (newLeft <= -1600) {
      list.style.left = 0 + "px";
    }
    /*从第一张偏移值到最后第一张*/
    if (newLeft > 0) {
      list.style.left = -1200 + "px";
    }
  }
  prev.onclick = function () {
    animate(400);
  };
  next.onclick = function () {
    animate(-400);
  };
};
当我们取消掉#container里的overflow: hidden时发现如图:

②. 当鼠标移出图片范围,自动切换下一张图片;当鼠标移入图片范围,停止切换下一张图片
原理: 这个功能我们需要用到window对象的setInterval()间歇调用方法,所谓的间歇调用就是每隔指定的时间就执行一次代码。
在这我们需要鼠标移出图片范围,每隔指定时间就切换到下一张图片。
在代码中插入:
var timer;
function autoplay() {
  timer = setInterval(function () {
    next.onclick();
  }, 2000);
}
autoplay();
当鼠标移入图片范围时,清除定时器
/*---鼠标悬停停止---*/
var container = document.getElementById("container");
function stopplay() {
  clearInterval(timer);
}
container.onmouseover = stopplay;
container.onmouseout = autoplay;
③. 切换到某一张图片时,底部的按钮样式也跟着改变
var buttons = document.getElementById("buttons").getElementsByTagName("span");
var index = 1;
function showButton() {
  //清除之前的样式
  for (let i = 0; i < buttons.length; i++) {
    if (buttons[i].className == "on") {
      buttons[i].className = "";
    }
  }
  buttons[index - 1].className = "on";
}
prev.onclick = function () {
  index -= 1;
  if (index < 1) {
    index = 4;
  }
  showButton();
  animate(400);
};
next.onclick = function () {
  index += 1;
  if (index > 4) {
    index = 1;
  }
  showButton();
  animate(-400);
};
④. 点击按钮即会切换到相应位置的图片
for (var i = 0; i < buttons.length; i++) {
  buttons[i].onclick = function () {
    var clickIndex = parseInt(this.getAttribute("index"));
    var offset = 400 * (index - clickIndex);
    animate(offset);
    index = clickIndex;
    showButton();
  };
}
本文章参考前端网:程序媛_小发,仅供学习使用。